Sourdough Croissants

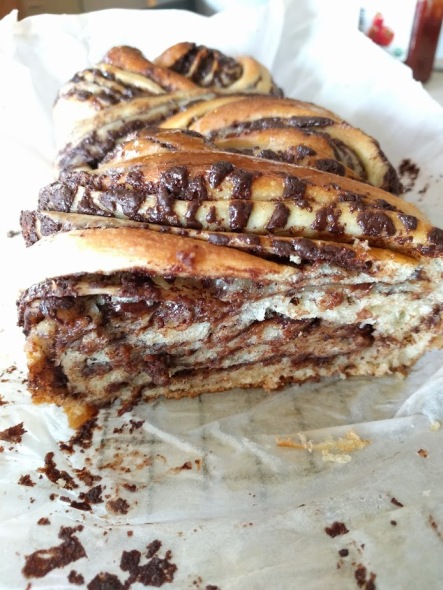
Plain, Chocolate Au Pains, Ham & Cheese, Chicken Alfredo… all of these delicious Croissants begin with one dough, and when it is mastered, the combinations are unstoppable!


This year, I decided to challenge myself to get our of my comfort zone of the traditional foods I make all the time and begin to learn more advanced techniques and technical recipes that I hadn’t previously made!

I proceeded to get a cookbook focusing specifically on French Patisserie and the first thing I tried was Eclairs (or Choux Pastry) which I truly surprised myself at how well they turned out (recipe to come!). Once accomplishing that recipe, I chose to move on to something a little more trying, Croissants, with their beautiful lamination, and if that wasn’t enough, I chose to up the ante by making them with natural leavening from the get-go instead of commercial yeast. After much reading and researching, I found THIS recipe, but being as the technique differed slightly from what my cookbook called for, I followed the steps for hers my first time through, but found that I prefer the directions from my cookbook better, so I will be imparting my take on the technique used in The Art of French Pastry by Jacquy Pfeiffer.

This recipe is a 1-2 days process, so you will want to plan that into your timing appropriately, and although it is important to get the lamination done correctly, in my most recent bakes, I have messed it up a little and they still taste amazing, just lack slightly in the layers, so don’t beat yourself up! Practice is key, and the more you make them, the more naturally it will just flow.


Sourdough Croissants (makes 10)

  • 2/3 Cup or 200g Sweet Sourdough Starter, stirred down
  • 1 3/4 Cup + 1 Tbsp or 200g AP Flour
  • 2 1/2 Tbsp or 38g Sugar
  • 1 1/3 Tbsp or 15g Butter
  • 1/4Cup – 1 Tsp or 45g Milk
  • 1 Egg or 30g
  • 1 Tsp or 7g Sea salt
  • 12 1/3 Tbsp or 150g Butter
  • Egg Wash (1 Egg + 2 Tbsp milk)


Bring all ingredients to room temperature.

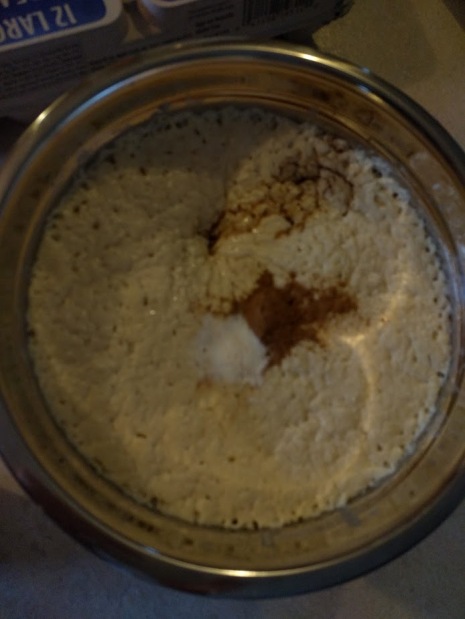
In the bowl of a stand mixer, add the starter, flour, sugar, 15g butter, milk and egg. Mix until only just combined, then rest for 20 minutes. Switch to the dough hook, sprinkle sea salt over the top and knead for about 1 minute, just enough to have everything incorporated and the dough not to be lumpy.

Rest for 3-4 hours, until your dough is about double in size.

Shape dough into a 1-in disk, wrap in plastic and refrigerate for one hour. Mark an 8″x6″ rectangle on a piece of paper, then use it to shape the 150g of butter into an 8″x6″  rectangle between two pieces or plastic wrap, and refrigerate for 45 minutes.

When both the dough and butter are chilled (but not hard), bring them out of the refrigerator. Dust the countertop with flour and roll the dough out to a 16″x8″ rectangle. Place the butter on one half of the dough and cover with the other half of the dough, sealing the edges so that the butter is completely encased by the dough.

Roll out dough from one end to the other gently, being careful to apply even pressure so as to keep the butter even within the dough and prevent it from popping out. Be sure to keep the surface you are rolling it out on well-floured, so that the dough does not stick. When you have rolled the dough out to a length of about 20 inches, fold one third of the dough over the center, dust off any excess flour and fold the other end of the dough over the center, so as to resemble a letter. Wrap tightly in plastic and refrigerate for 30 minutes. This is the first fold, and there will be a total of 3.

After 30 minutes, remove from refrigerator, roll out dough until it is about 20″ inches long and repeat letter fold again. Wrap and return to refrigerator for 30 minutes. Repeat roll & fold one more time, and refrigerate overnight.

The next day, remove from the refrigerator and allow to warm slightly, about 30 minutes. Roll out dough to a rectangle, about 20″x7″, or slightly larger. Allow dough to rest for a few minutes to prevent shrinking when cutting. After rest, roll gently 1-2 more times, then cut croissants.

For Croissants, mark every 3-1/2 inches on ones side, and do the same on the opposite side, but start in from the end at about 1 1/4in. This will give you 9 whole triangles and 2 half triangles, which will connect in the middle to form the 10th one.

Make a 3/4 in cut in the middle of the wide end of the triangle. Fold out the bottom ends before rolling up tightly. Place on a parchment paper lined baking sheet, leaving at least 1 inch between each one. Brush with egg wash.

Cover loosely with plastic wrap, and allow to rise at room temperature until they are risen and pillowy (if you bump it with your finger, a slight indentation will remain)

Prove overnight in the refrigerator, remove from refrigerator and bring to room temperature. While they are coming to room temperature, preheat oven to 375°. Brush gently with egg wash a second time and bake for 18-20 minutes, or until golden-dark brown on top.

Allow to cool slightly before serving.


The dough can be frozen immediately after shaping for up to one month, simply defrost on a sheet pan, then follow the steps as if making them fresh.

Baked rolls can also be frozen for 1 month as well. Defrost on a baking sheet as well, then bake for 1 minute at 450°F to crisp again.


I know this recipe can be daunting, but these beautiful buttery rolls are just soooo good, and I love experimenting with flavors and add-ins. I hope you enjoy them, and if you have any questions or comments, please let me know!!

Thank you so much for stopping by!!!! Every one of you make my day every single time, and I hope you stop by again soon!

<3/Jenn


Sweet Sourdough Starter

You may have noticed a few of the sweet yeasted bread recipes I have posted called for a “Sweet Sourdough Starter,” and how foolishly I did not post the recipe for this before!!

In my initial endeavor at making a Sourdough Croissant, the only recipe I came across (you can find it HERE) gave instructions for a Sweet Sourdough Starter, but the instructions for me just didn’t click… so I went a step further, to the original site she listed, which you can find HERE for answers!

Upon reading the site and her directions again, I decided to go with a pared down version of the Sweet Sourdough Starter. As I considered how I would share this with you all, the question in my mind was “Why?” With commercial yeast, you use one type of yeast for all kinds of dough, savoury and sweet! Why make a second starter and give yourself the hassle of another starter to feed and upkeep?

I now can give you two very good reasons to create a Sweet Sourdough Starter!

1. Taste

When I make something like Cinnamon Rolls, Babka, or even Croissants, I want to use my Sourdough Starter because the health benefits and nutrition you gain in using wild yeast vs. commercial yeast is just incomparable. However, after I allow my Sourdough Croissants or Cinnamon Rolls to prove overnight or 2 nights, I really don’t want a strong sour flavor, and using a Sweet Sourdough Starter gives a hint of tang but nothing undesirable that takes away from enjoying them.

2. Strength

When dealing with an enriched dough, your starter needs to be a strong, mature starter with enough muscle to power the rise in spite of the milk, butter, etc that is weighing it down!. This Sweet Sourdough Starter is just what the doctor prescribed. Since getting to a point of being a strong, established starter, I have been storing the starter that I have not needed to use, covered in the refrigerator, and my Sweet Starter has pushed its way out of a sealed jar, in the refrigerator! It has proved to have the strength needed to give the rise I desire to my enriched breads, and I believe you will be satisfied with it as well!

This Sweet Starter requires an already established Sourdough Starter to grow off of and it is quite a solid starter, with just a small amount of hydration. I have successfully increased the hydration with no harmful affects, and I am sure you can experiment with it to obtain the desired affect!


Sweet Sourdough Starter

Starting Ingredients

  • 50g Sourdough Starter
  • 40g Flour
  • 10g Sugar
  • 16g Water


Feeding Ingredients

  • 50g Sourdough Starter
  • 40g Flour
  • 10g Sugar
  • 16g Water


Treat as a regular Starter, with discard or feeding double, if you are building up the volume. To eliminate waste, store discard in refrigerator in a closed container, and pull out amount needed when beginning to prepare for a recipe.

Please feel free to leave any questions or comments below!!

Thank you as always for stopping by!! I hope you come again soon!

<3/Jenn

Sourdough Birthday Cake Cinnamon Rolls

img_20170221_090559

Hello Dear Ones! I hope you all had a fantastic week! Ours was a bit busy, our oldest little man turned 4 on Tuesday, but he chose to wait to celebrate until Friday so that his cousins could join us! It was so incredibly sweet of him to choose to wait but it made for a busy week!

I love making special days even more special, and birthdays are no joke! I love cinnamon rolls, both the making, and especially the eating :), and in my learning of sourdough, I chose to make these ones with natural leavening. I had never made these before with sourdough starter, and the birthday cake filling was my first try, as an altogether different recipe I had tried in the past just had not stuck out to me!

I have to tell you that for being a first try, these cinnamon rolls struck gold! My husband does regularly give compliments when he likes the food that I make, but these cinnamon rolls were “Unbelievable” and he literally could not stop eating them. For a man that does not always care for sweet things, I believe that was the highest compliment I could ever receive!

These are a full day process, I have to warn you, as with all sourdough.However I have found the sourdough process to be so entirely relaxing instead of burdensome! The process of working with the natural flow of things, and allowing it to do its work, as opposed to having to stick to a strict 1 hour schedule is just awesome, and I can almost guarantee that you will fall in love too!

I have chosen to give you the recipe first, and if you would like to see pictures of each step, you will find them after the recipe. I personally many times will only need the recipe, and I hope to make your visit more enjoyable by setting it up this way!

img_20170221_085722

Sourdough Birthday Cake Cinnamon Rolls

For the Dough (original recipe found here):

  • 3/4 Cup Sweet Sourdough Starter, stirred down
  • 1/2 Cup Milk
  • 1/4 Cup Butter
  • 1/2 Cup Honey
  • 1 Egg
  • 1 Tsp Vanilla
  • 3 Cups AP Flour
  • 1 Tsp Cinnamon
  • 1/2 Tsp Salt

For the Filling:

  • 1/3-1/2 Cup Butter, softened
  • 1/2 Cup Light Brown Sugar
  • 1-2 Tbsp Cinnamon
  • 1/2 recipe Birthday Cake Crumble
  • Sprinkles

For the Frosting (original recipe here):

  • 1/2 Cup (1 stick) Butter, melted
  • 2 Cups Powdered Sugar
  • 1 Tsp Vanilla
  • 2-3 Tbsp Milk


For the Dough:

In a saucepan over medium heat, combine the milk, butter, and honey and heat until just melted. Remove from heat. In a mixing bowl, whisk together flour, cinnamon, and salt; set aside.

In the bowl of a stand mixer, combine sourdough starter, egg, vanilla, and milk/butter/honey mixture and mix until just combined. Add in the flour mixture all at once and mix until just combined, as well.

Switch to the dough hook and knead on low for 6-8 minutes until dough is smooth.

Shape dough in a ball and place in a bowl with room to rise. Cover with a towel and let rise for about 6 hours, with a few stretch & folds as it is rising.

After 6 hours, and the dough has visiby risen (if there is no rising after 3-4 hours, boil some water in a pot and place the covered bowl as well as the pot of water in an unheated oven, and it will aid in rising),gently  roll out the dough into a large rectangle, approx 20 inches wide, and as long as it will go!

For the Filling:

Spread the softened butter over the dough in a very thin layer. Sprinkle brown sugar, then cinnamon over top of the butter. Finally, sprinkle the Birthday Cake Crumble generously over top of the sugar and cinnamon, along with additional sprinkles, if desired.

Roll up tightly into a log, started at the 20 inch long side. Cut 1/2 inch off of the ends, then cut into 12 – 1 1/2 in long pieces.

Line a 13×9 inch cake pan with parchment paper and place rolls in pan with equal distances between each one.

Cover with plastic wrap and let rise until they are doubled in volume.*

When rolls have reached appropriate size bake **at 350°F for 20-25 minutes until golden brown.

For the Frosting:

Combine all of the ingredients in a bowl and whisk until smooth. Frost rolls while they are still warm. Enjoy!


*It took overnight for my rolls to reach baking size.

**At this point, rolls may be covered and refrigerated to be baked later, and they may go straight from the refrigerator to the oven with no adverse affects.

img_20170221_090249

The morning sun is a killer!!


  1. Combine milk, butter, and honey in a saucepan on the stove and heat just until melted together. In the bowl of a stand mixer, combine the sourdough starter, egg, and vanilla, then add in the milk mixture and mix until just combined. Whisk together flour, cinnamon, and salt in a mixing bowl and add to the sourdough mixture all at once, mixing only until just combined.

2. Switch attachment to dough hook and knead on low for 6-8 minutes, until dough is smooth. Shape into a ball and place in a medium bowl. Cover and allow to rise 6+ hours, stretching & folding a few times in between.

3. When dough has risen considerably, transfer to a well floured surface and roll out into a large rectangle, approximately 20 inches wide, and as long as it will go. Spread with softened butter in a thin layer, then sprinkle with brown sugar, cinnamon, Birthday Cake Crumble, and sprinkles, in that order.

4. Roll tightly into a log, beginning and ending at the 20-inch ends. Cut 1/2 inch off the ends, then cut into 12- 1 1/2 inch pieces with dental floss. Line a 13×9 cake pan with parchment paper and place pieces in it, at equal distances from each other.

5. Cover with plastic wrap and allow to rise until they are almost the size they will be when they are baked. At this point, if you do not want them to be baked, they can go into the refrigerator, covered, and then straight from the refrigerator to the preheated oven.

Otherwise, you may bake them immediately in a 350°F oven for 20-25 minutes, until golden brown.

img_20170221_085722

6. While the rolls are baking, combine all of the ingredients together and mix until smooth.Frost rolls when they are still warm!

Enjoy!!

img_20170221_090559

Overnight Sourdough Waffles

img_20170220_101834

Allowing the sourdough to do all of the work overnight, these are an easy, healthy breakfast for all ages to enjoy!

Hi there! Happy Monday! This morning definitely felt like a Monday for this momma! I try to kick myself outta bed a little early, before everyone else, but this morning I definitely DID NOT want to! Needless to say, it was a slow moving morning and I was so incredibly thankful I had set these waffles up last night, because I literally just had to throw in a couple eggs, baking soda and my add-ins, andthey were ready to go!

Before you get ready to make these, you definitely need a sourdough starter because that it what makes these so easy! If you haven’t started one yet, you can check out my Journal of a Sourdough Starter for all the details on getting that started. If you’re all ready, let’s just get to the recipe!

The original recipe is from Smart Nutrition, and her post has all kinds of extra info if you would like to check it out, but if you’re like me, you just want to get to making and save that for later :).

img_20170219_220201

Horrible lighting!! (I will update with better pics!)

To start out, mix together the melted butter and milk. Add the milk to the sourdough starter, and to that add the flour, honey and salt. Mix everything together until it is well combined, then cover with a lid or plastic wrap and let sit overnight. You will want to make sure there is lots of extra room in your bowl, mine doubled as it sat! 🙂

img_20170220_083548

The next morning, add in your eggs, vanilla, baking soda, and any extras like cinnamon or chocolate chips! Stir until well combined and cook in your heated waffle iron as directed by the manufacturer!


If you make these, I would love to hear about them or see them by tagging me on Instagram #impassionedkitchen.


Overnight Sourdough Waffles (Yield: 9-10 Square waffles, may vary based on waffle maker)

  • 1/2 Cup Butter
  • 1 Cup Milk
  • 1 Cup Sourdough Starter, stirred down
  • 1 Tsp Salt
  • 1 Tbsp Honey
  • 1 1/2 Cups AP Flour
  • 2 Eggs
  • 1/4 Tsp Baking Soda
  • 1/4 Tsp Cinnamon (optional)
  • 1/4 Cup Mini Chocolate Chips (optional)


Melt butter and add milk in to warm it up. In a medium bowl with room for batter to double in size, add milk/butter, salt, honey and flour to sourdough starter and mix until well combined. Cover with lid or plastic wrap and let sit overnight at room temperature.

Preheat waffle iron.

Add eggs, baking soda, cinnamon and chocolate chips to batter and mix well.

Cook on heated waffle iron according to manufactures directions.

Enjoy!

img_20170220_101834

I am honestly not quite accustomed to the sourdough taste in waffles myself, but it is growing on me! I may toss in a little extra honey next time, but my children loved these as is, and I will definitely be making them again soon!

Thank you so much for stopping by, the amount of views I have received today has surpassed every other day since I began this blog and I am truly humbled and in awe that so many would be interested in the things I have made. You make this little momma feel very special and I appreciate each and every one of you!

<3/Jenn

Sourdough Pizza Crust

img_20170217_170928

This crust is the perfect balance of light and soft without being too much and a perfectly crisp bottom crust!

I must confess something to you. I think I may have a slight obsession with sourdough! I love knowing that anything that I make with it, so long as it has the proper fermentation period is packing is health benefits even if it is PIZZA! Like, seriously, you can’t go wrong! Also, being able to plan ahead, let this stuff take its time while I do all the mom stuff, then put in the refrigerator and come back to beautiful dough? It’s definitely a no-brainer, I am in love.

This crust is definitely a plan-ahead meal. You will need to begin at least one day in advance, but don’t worry, if you make it and the day doesn’t go as planned, the dough is good in the refrigerator for up to 3 days (72hrs), so you can move pizza night to the next day, and the crust is already ready, and the dough is going to be even better :).

You will see in my pictures below that I used my cast iron skillet upside down! I have never ever made it like this before, and I don’t think I will ever go back! The crust was just perfect, I think I just need one that’s a little bigger (*hint, hint hubby LOL*)!

If you haven’t made a sourdough starter yet, you can check out my Journal of a Sourdough Starter and make your own, it is seriously so easy! If you have one, you will have wanted to have fed it within the last 12 hours to ensure it is active.

You will also need a kitchen scale. If you do not own one, don’t worry yourself tooooo much about it, I baked for years without one, and I have translated the metric measurements to volume for you. However if you find that you love working with bread and home baking,  I do highly recommend a scale, because volume measurements are not always accurate, depending on how settled your ingredients are. I used to think of them as a pain, but I have come to love mine. It has become indispensable,  and it equals a few less dishes by measuring everything into one or two bowls! I have THIS scale, and I have found it to be pretty good. It does not measure smaller than whole grams, but at this point in my kitchen, this gets the job done!

This dough recipe is taken from jernejkitchen.com.

You are going to start out by mixing together the flour, water and oil until they are thoroughly combined, then cover the bowl with a cloth and let it set for 30 minutes.

When the 30 minutes has passed, add in the active sourdough starter and salt and knead for 15 minutes on the lowest speed on your mixer. (You can also knead by hand if you like, as well!)

When dough is done being kneaded, form into a ball and place in a bowl. Cover with a towel and let sit at room temperature for 5 hours. After 5 hours has passed, divide dough equally (250g each, if you have a scale), then place in a dish, cover and refrigerate overnight.

When it is time to make your pizza, preheat your oven as hot as it will go (I only heated mine to 500°F because I was using cast iron and the brand I have is not recommended to go higher. I did not sacrifice taste, but my crust edge was not very brown!)

Working one section at a time, roll into a ball. Then, on a a gently floured surface,  gently stretch to desired size, transfer to parchment paper lined cookie sheet, pizza stone or cast iron pan (if using cast iron, preheat with oven). Finish pizza dough with desired toppings and bake 5-8 minutes.

img_20170217_172101


Sourdough Pizza Crust (Yield:4 – 12″ pizzas)

  • 3 1/2 Cups (500g) AP Flour
  • 1 1/4 Cups (300g) Water
  • 1 Tbsp Olive Oil
  • 3/4 Cup (200g) Sourdough Starter (If measuring by cups, stir down beforehand)
  • 2 Tsp (10g) Sea Salt


Day One

In the bowl of a stand mixer, combine flour, water, and oil and mix until thoroughly combined. Cover bowl with a towel and let sit for 30 minutes.

Add in starter and salt and knead with the dough hook on the lowest number speed (not stir) for 15 minutes (or alternatively knead by hand for approx 15 minutes). Form into a ball and place in large bowl. Cover with a towel and let sit at room temperature for 5 hours.

Divide dough equally into four parts (250g each) and shape into a ball. Place on a tray or in container, cover and chill in refrigerator for 12-72 hours.

Day Two

Preheat oven to its hottest temperature.

Working one piece of dough at a time, on a lightly floured surface, stretch dough into a pizza shape.

Transfer to a parchment-paper lined tray, pizza stone or cast iron pan (if using cast iron, preheat with oven), finish with favorite toppings and bake 5-8 minutes.

Enjoy!!!

pizza

Finding the perfect pizza dough has been an adventure for our family! We have a favorite quick dough if you are in a hurry. You can check that out HERE, but so long as I can, I believe this is going to be our go-to crust recipe from now on. It received several stamps of approval from my dear hubby, and pizza is always a winner with little ones. I hope that it may perhaps become a favorite of yours as well!

Thank you so much for stopping by! You seriously make my day, and I am thrilled to share what I love with you! I hope you enjoyed your visit and come again soon!

<3/Jenn


Naturally Leavened AKA: “Sourdough” Chocolate Babka

img_20170211_094633-copy

Soft, slightly sweet yeasted bread with a delicious dark chocolate swirl… this one is a keeper!

Hello loves, and Happy Wednesday!! This week has been so stinking busy!! Valentine’s Day was yesterday, and… corporate holiday or not, it gives me a wonderful reason to spoil my love, and I adore it! I have always heard “The way to a man’s heart is through his stomach,” and although I may already have his heart… I still like to make goodies to “tickle his tummy.” It is for that reason I made this on Saturday, and did not get this posted until now, because I have really stepped out of the kitchen until now.

On to the real reason we are all here… this delicious bread!! Until I started researching babka recipes, I never realized the history and variations between nationalities that there are! This version is the most commonly known, it is the Jewish variation, which is composed of a dough similar to the Challah (which I hope to conquer soon!), with a dark chocolate swirl running throughout.

Since successfully building and maintaining a soursough starter, as well as a sweet sourdough starter, it is my goal to make all things yeasted with that versus commercial yeast. I will still keep a little on hand just in case I need something last minute, but the health benefits that sourdough packs makes it worth the little extra time it may take.

I made croissants a few weeks ago (I cannot wait to make them again and share with you!), and to do so, I had to create a sweet sourdough starter. I figured that I plan to make items often enough that it is definitely worth it to me to keep it going, and that is what I used to create this!

This is a combination of the recipe from Smitten Kitchen as well as Danid Lebovitz with some adjustments for a sourdough starter.

You will start out by mixing your starter with the flour, sugar and sweet starter. Add the egg and mix with the dough hook just until the dough comes together. It is okay if the dough seems a little dry, if needed you can add water 1 teaspoon at a timejust  until the dough forms a ball, but that is it.

Once tha dough comes together, add the salt and then the butter, 1 tbsp at a time until it is thoroughly distributed throughout the dough. Once the butter is incorporated, mix on medium speed (still with the dough hook) for 10 minutes until the dough is completely smooth, and pulling away from the bowl. You will probably need to scrape the bowl once or twice. If the dough is not pulling away from the bowl by the end of the 10 minutes, you can add 1-2 teaspoons of flour and you should see an improvement.

Grease a medium-sized mixing bowl, and place dough inside. Cover bowl with plastic wrap and let rise until it has close to doubled its size, between 6-12 hours. Stretch and fold the dough 3-4 times throughout the rise time (Here is a good video demonstrating how to).

When dough has completed this initial rise, put in refrigerator to ferment overnight (fermenting does not mean your dough will taste nasty, with sourdough, you are simply giving the natural yeast a chance to break down the gluten further and make your dough more delicious),

The next morning, make your filling by melting the butter and chocolate together, then add in confectioner’s sugar and cocoa and stir until smooth.

Line your loaf pan with parchment paper or grease well.

Remove dough from refrigerator, and roll out as thin as you possibly can, while keeping a 10-12 inch width. This will give you lots and lots of layers! Spread filling over top of the dough, leaving 1/2 inch edge around the entire perimeter. Roll up dough, short edge to short edge, and when you are almost to the end of the roll, brush some water on the edge, then seal the end of the roll to the log.

Place roll on a lightly floured tray and freeze for approx 10 minutes.

Trim 1/2 of of each end of the log, then slice in half length-wise. Flip pieces inside out , so that the chocolate is facing out, then lace one piece over the other, alternating until you get to the end of the loaf, to give a braided look.

Transfer braid to prepared pan and cover with plastic wrap or a damp towel until the loaf has doubled in size. (This could take 4+ hours, depending on the atmosphere/temperature that day, don’t worry if it’s taking forever)

When loaf has reached desired size, preheat oven to 375°F, and bake ofr approx 30 min, until a skewer inserted into the center comes out clean (a little chocolate is okay, but no dough), and center does not feel rubbery or stretchy inside when you insert the skewer or toothpick.

img_20170211_094618-copy

While the babka is baking, make your syrup, and let it cool. When the babka is done, spoon or brush the syrup over the hot loaf. Let cool at least 10 minutes in pan, then transfer to a rack to allow to cool completely. (It’s ok to eat warm too)


Naturally Leavened AKA: “Sourdough” Chocolate Babka

Dough:

  • 1/2 Cup Sweet Sourdough Starter, stirred down
  • 1/4 Cup Sugar
  • 2 1/4 Cups AP Flour
  • 1 1/2 Eggs (to half an egg, whisk all together, then measure out approx 2 Tbsp)
  • 1/4 + pinch of Salt
  • 1/3 Cup Unsalted Butter

Filling:

  • 2 1/4 Oz. Dark Chocolate
  • 1/4 Cup Unsalted Butter
  • Scant 1/4 Cup Confectioner’s Sugar
  • 2 Tbsp + 2 Tsp Cocoa Powder

Syrup

  • 2 Tbsp Sugar
  • 2 Tbsp Water
  • 1 1/2 Tbsp Honey


For the Dough:

In the bowl of a stand mixer, combine the starter, flour and sugar. Add the egg and mix with a dough hook just until the dough comes together, adding 1-2 tsp of water, but only  if needed.

While mixing on low, add the and the salt and the butter, 1 Tbsp at a time, until thoroughly distributed throughout the dough. Once the butter is incorporated, mix on medium with the dough hook for 10 minutes until the dough is smooth and pulling away from the bowl. Add 1-2 tsp flour, but only if dough is not pullling away from the bowl at the end of 10 minutes.

Transfer dough to greased bowl and cover with plastic wrap. Let dough rise 6-12 hours, until it has risen close to double its size. Chill overnight.

For the Filling:

Line a loaf pan with parchment paper or grease well; set aside.

Melt butter and chocolate together and mix until smooth. Add in confectioner’s sugar and cocoa and mix once again until smooth; set aside.

Transfer chilled dough to a well floured surface, and roll as thinly as possible, keeping at a 10-12-in width. Spread filling over dough, leaving an open 1/2-inch edge around the perimeter. Roll into a log begining at a short end. When the log is almost completely rolled up, brush the closing end with water and seal edge into log.

Transfer to a lightly floured tray and chill for 10 min in freezer. Slice chilled dough in half length-wise, then flip inside edges out. Cross one piece over the other, and vice-versa to the end.

Transfer braided dough to prepared loaf pan, cover with plastic wrap or damp towel and let rise until doubled (4+hours)

Preheat oven to 375°.

Bake for 25-30 minutes, until a toothpick inserted in the center comes out dough-free.

For the Syrup:

While babka is baking, combine syrup ingredients in a small saucepan over medium heat and cook while stirring until sugar is completely dissolved. Remove from heat and allow to cool.

When babka is done, spoon or brush syrup over the top of loaf and aloow to cool at least 10 minutes in pan before removing to wire rack to cool.

Let cool or serve warm. (I personally recommend the latter!)

Enjoy!


This is comtinually a learning experience for me, and as I improve and learn, I will update here! Thank you so so much for stopping by to check out my spot. I hope you have enjoyed your visit, and definitely come again soon!

<3/Jenn

babka


Journal of a Sourdough Starter

wp-1486064683289.jpg

This is the journal of a sourdough starter… my good old, Oklahoma wild yeast, red dirt sourdough starter. This is not the first starter that I have made, but hopefully, Lord-willing, it is my last, as I hope to keep this one alive and flourishing for a good loooong time! Sourdough is absolutely amazing to me. The though that you can make a beautiful, nourishing piece of food with only flour and water, and to get to watch it grow and come to life right before your very own eyes is nothing short of spectacular.

It is my hope and intention to grow in my sourdough skills and knowledge and ultimately use this natural leavener in place of an commercial yeast, as it is so frustrating to me to see recipes that call for active yeast on top of the started, whici seems to me to be such a waste of such a beautiful thing!

I recently grew my own sourdough starter, beginning on January 20, and today, February 1, baking my first loaf of sourdough bread. I followed the guide at theperfectloaf.com, and I was amazed at how natural and how much more comfortable I was just in pbserving the differences in growth and knowing what I needed to do, it was awesome. As I learn and grow, I hope to update this with more precise instructions and science, but for now, I can only tell you what I did. Therefore, I highly recommend you check them out, and only use my own as a reference and inspiration to know that you CAN do it!

A feeding = 40grams of flour + 40 grams of water

I did use a smaller amount of water, as my starter was extremely liquified when I got to about day 10, but I kind of played it by ear. I will update with specific amounts as I figure them out 🙂

wp-1486064667284.jpg

On The Perfect Loaf, the recommendation is a combination of AP and rye flour, however I only have AP at this time, so that is what I did. I followed their directions to a T up to where the feeding go to 2 a day, and because the spot in my kitchen where I had been keeping my starter was a little cooler, my starter was not strong enough at that point, so I stayed with one feeding a day up until about day 7, when I could see that the starter had risen and fallen within the first 12 hours.

Day 2: Bubbles mean evidence of life!! (side note, I stopped using a cheesecloth to cover it, and instead used a plastic bag that wasn’t tight, so that the moisture couldn’t evaporate, but there was still air for the yeast to breathe)

wp-1486064709533.jpg

Day 3: The ring higher up means that it has started to rise and fall *YAY*

wp-1486064721742.jpg

Day 4: I forgot to take a picture before I fed it, but still healthy!

Day 5: Before I added in the flour and water… bubbles are an awesome sign that we are still doing good!

wp-1486064787152.jpg

Day 6: I attempted to start 2 feedings a day, but there wasn’t a quick response in growth, so I stuck with only one for a few more days. 

wp-1486064804920.jpg

Day 7: Sticking with the same program, the smell is still good, so I just fed it and waited for nature to do her thing!

wp-1486064818740.jpg

Day 8: I decided to mark where it started at today, because something just told me it was ready to start 2 feedings a day…

wp-1486064853283.jpg

Day 9: …and I was right, this was after just a little over 12 hours, and you can see how much bigger it had grown!

wp-1486064860111.jpg

Day 10: Officially up to 2 feedings a day and going strong!

wp-1486064877942.jpg

Day 12: I decided to simply bulk my starter up, so instead of discarding any, I simply continued to feed it 2 times a day, but moved it to a larger jar. I hope to use this quite often, so the larger quantity is what I need.

Today, I am happy to report that I am in the process of baking my first sourdough loaf from this starter, as well as having another sourdough recipe in the works! I will be sharing as I work out the kinks, and I would love to see yours if you choose to make one! Please tag me @impassionedkitchen on Instagram!

If you have any questions or suggestions, please leave them below and I will do my very best to respond quickly!!

Thank you for allowing me to share a little slice of my world with you!! Have an awesome day!

<3/Jenn