I married my husband knowing that he was and avid hunter, and when we moved to Oklahoma, I excitedly jumped into learning how to process a deer, from field to table!
As of today, I have successfully skinned, process, and cooked venison. This last deer season, we enjoyed some venison for meals, however the favorite treat for all of us is venison jerky. Today I am going to share with you the step-by-process of how I make my jerky and obtain the most tender and flavorful venison jerky I have had to date!
Before you start making jerky, you are going to need a dehydrator. I have read of some people using a low heat oven to make jerky, and if you aren’t going to make use of a dehydrator that often, it may work best for you to look into that technique. However, for myself, having small children, as well as the extensive amount of time it takes, AND the recipes I read called for the oven door to be cracked open, which is oh-SO-tempting for curious fingers, I chose to purchase a dehydrator. After reading reviews, and considering prices, I chose to go with THIS dehydrator to start with, and I definitely would recommend it to start with.


Now on to the jerky-making! I try to keep the pieces at about 3/8inch thickness, and about 4 inches long, but as the cuts vary, so do the shapes and sizes, so if yours vary, don’t worry too much, just keep it as a reference point. When I process our deer meat, it is pretty much an all-day thing, because I will cut the meat into jerky before I even freeze it, eliminating that step later. It is time consuming, but definitely worth it for the simplicity later!


When I am ready to make the jerky, I prepare a salt water soak for the meat. Some people do not find it necessary, and if that is their preference, that’s awesome, but I find that it makes the jerky more tender, flavorful, as well as the added bonus of knowing that the salt will kill any potential bacteria that could be there (although we have never ever had any problems with this) The salt water ratio I use is 1:4 salt to water. I will mostly dissolve the salt in the water and then add the meat, one piece at a time, to try and prevent pieces from sticking together, and then allowing them to soak for a full 24 hours.


After soaking in the salt water for 24 hours, the salt water is going to be bright red, while the meat is going to appear almost grayish in color. Please do not be alarmed; the salt water draws most of the blood out of the meat, this is completely natural. Next, I mix together all of the marinade ingredients (recipe below), and put it in a large freezer bag, along with the meat. I try to get as much air as possible out of the bag, to make sure all of the meat is covered. This marinade recipe successfully marinades 3-4 lbs of meat at a time for me, and it is easily doubled or halved, depending how much you need! I marinade the meat a minimum of 24 hours, I wouldn’t feel comfortable soaking more than about 48 hrs.


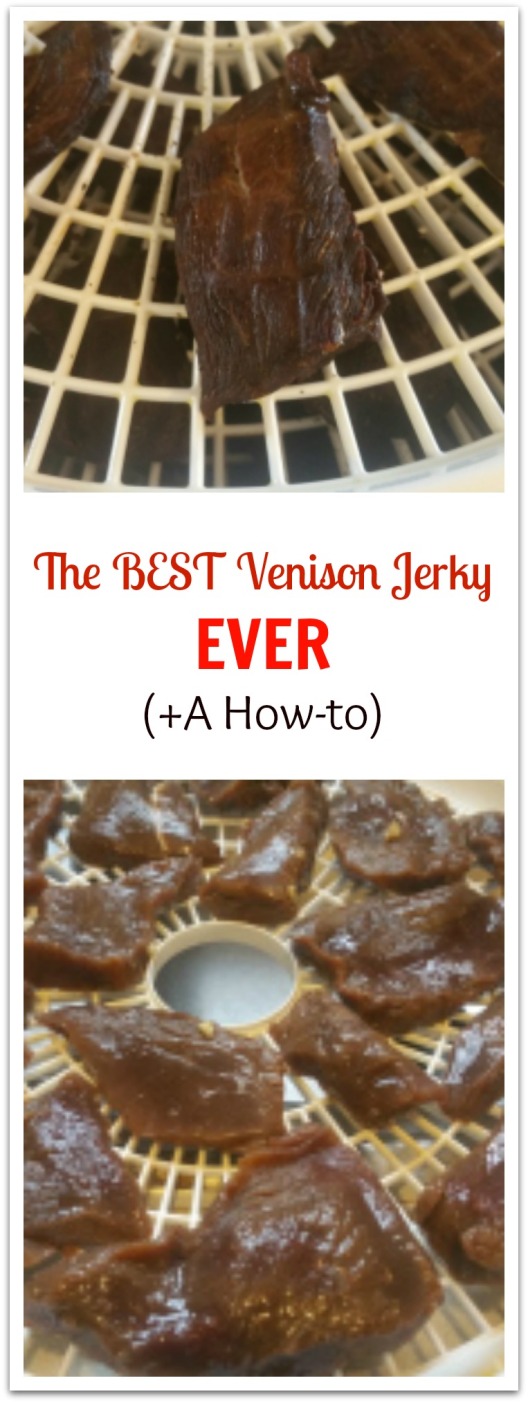
Once the marinading is over, it’s time to finish up. I always turn on my dehydrator when I start setting up, so it is warmed up by the time I get my racks on here. This dehydrator heats up pretty quick, and works awesome for me! Setup is simple, I look at it kind of like “adult jenga.” I spray my tray with nonstick cooking spray, and then fit as many pieces I can on the tray, without the edges directly touching each other…as you see in the picture, the fit can be a little tight, the main thing is just making sure air can flow around each edge of the piece so it dries evenly. The last thing I do before putting my tray on the dehydrator is to sprinkle some extra black pepper over the tops, but if you don’t want a little more of a peppered flavor, you don’t have to do that.
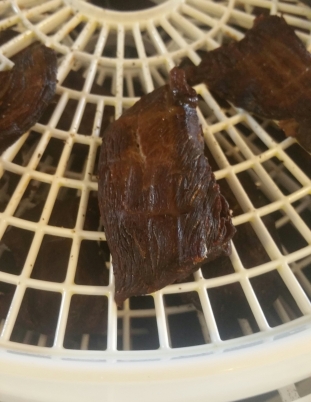
With This dehydrator, my dry time is about 5-6 hours altogether. Halfway through, when the bottom side looks about like the above picture, flip all of the pieces over and continue drying until your pieces crack when they bend, and the edges feel almost a little dried out. When all of your pieces reach this point (if you had any small bits and pieces in there, you can pull them off a little early, as they get done), turn your dehydrator off, and let all of the jerky cool off with the dehydrator. This step is really important, the first couple of batches we made this year would start to feel almost moist after a couple of days, which shouldn’t be happening, and the next time I just let everything completely cool togeher and the moisture problem was eliminated. At the point of turning your dehydrator off, you can safely eat the jerky, but if you plan to store the extra, you will want it to cool as I mentioned above. And there you have it… you have successfully made jerky!!
The BEST Venison Jerky Marinade EVER
You can find the original recipe HERE
1 Tbsp Salt
1/2 Tbsp Black Pepper
3 Cloves Garlic, minced
1/4 Cup Soy Sauce
1/4 Cup Worcestershire Sauce
1/4 Cup Water
1/8 Cup Cider Vinegar
1/2 Cup Hot Sauce
2 Tsp Liquid Smoke
1 Tbsp Old-Fashioned Molasses
1 Tsp Crushed Red Pepper
2 Tbsp-1/4 Cup Honey
Mix all ingredients together in a small bowl; use as desribed.
All amounts can be adjusted per your personal taste. If you try something a little different, I would love to hear about it below!!!!
