Chicken, Broccoli & Cheese Soup

img_20170202_171752

Does anyone else forget about soup being an option, or is that just me?? When fall and cool weather start creeping in, I see all these gorgeous soup recipes everywhere, but when it comes down to time to make dinner, they all fly out of my brain, and my family is stuck with the same old stuff, different day  🙂

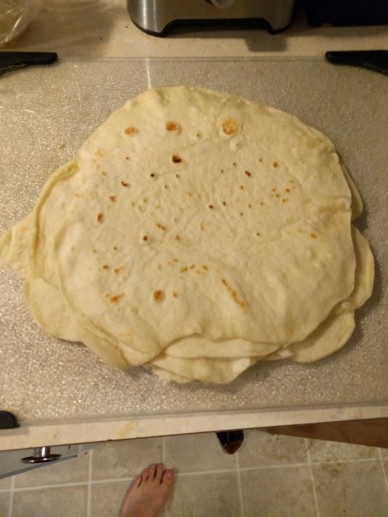
The weather here in good old Oklahoma is literally a roller coaster, one day in the 70s, the next in the 40s, and it just so happened last week ended on a cold note! My sourdough starter (check it out HERE) had just gotten strong enough to begin to use *woot woot* and I made this beautiful loaf of bread:

img_20170202_161621

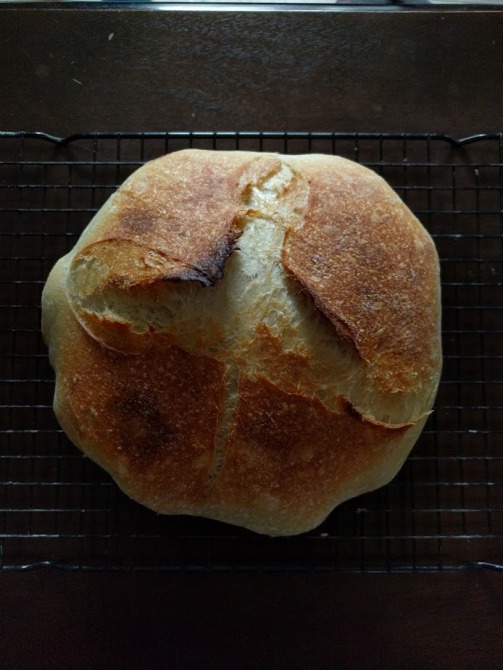
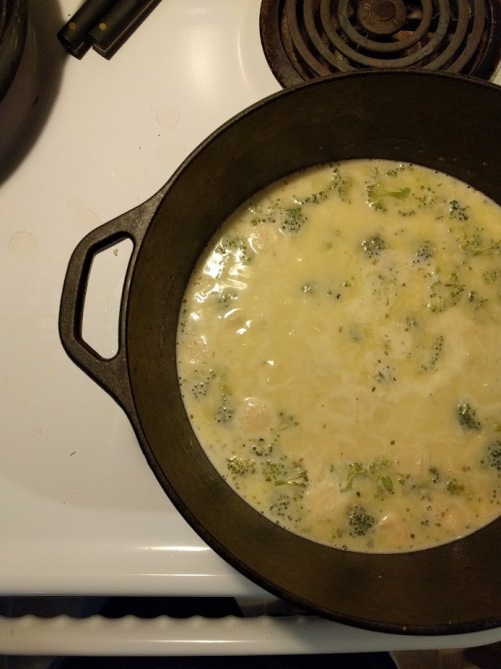
When bread is that beautiful, and it’s cold outside, there really is no other choice, you have to make soup! Soup is kind of difficult with little ones, however… right now our boys seem to eat with their eyes first, and if it doesn’t resemble chicken nuggets, they just don’t seem to understand what delicious flavors are all melded together! All of that left me with one choice… Chicken, Broccoli, and Cheese Soup!

This soup I made by cooking the chicken, broccoli and spices in chicken broth on low, to ensure that the chicken stayed tender. In a separate pan, I made a cheese sauce by making a roux with butter and flour, then adding in some milk and finally melting the cheese. Once the cheese sauce was completely melted and smooth, I combined them all together and allowed the soup to reduce slightly by simmering the soup for about 10 minutes, and then we were ready to eat!

By creating a cheese sauce separately instead of simply tossing the cheese into the soup and melting it at the last minute, it created a smooth soup instead of the cheese sometimes not mixing completely with the broth, and ending up with “dotty” cheese throughout your soup.

Chicken, Broccoli & Cheese Soup (amounts are approximate, and are pretty flexible per your own personal tastes)

  • 3 Cups Chicken Broth
  • 1 lb Boneless Chicken Breast, diced
  • 1 head Broccoli (or 8 oz. frozen Broccoli)
  • 1/4 Tsp Garlic Powder
  • 1/4 Tsp Onion Powder
  • 1/4 Tsp Salt
  • 1/4 Tsp Pepper
  • 3 Tbsp Butter
  • 3 Tbsp Flour
  • 3 Cups Milk
  • 8 oz Cheese (2 Cups Shredded) – I used half Sharp Cheddar/half Monterey Jack

In a medium pot, combine broth, chicken, broccoli and spices on low-medium heat and cook until chicken is cooked through.

In a separate saucepan, melt butter on medium heat. Add flour and mix until combined. Allow flour & butter to cook for about a minute, then add in milk slowly, whisking as you add it in to ensure that the milk and flour/butter mixture combine smoothly and there are no lumps. Heat the milk mixture on medium until the milk is almost boiling, stirring frequently to avoid scorching. When the milk is heated, add in cheese and stir until melted and smooth.

When chicken is cooked through, and the cheese sauce is thoroughly combined and smooth, add the cheese sauce to the chicken and broccoli and stir to combine. Simmer soup on medium to medium-high heat for about 10 min, until broth is reduced slightly.

Enjoy!

My husband, who is truly not a big fan of soup, said this has been his favorite so far, and I hope that you and the ones you love enjoy it too!

Thank you so much for stopping by! I hope you have a great day, and that you stop again soon!

<3/Jenn

Soft & Thin Flour Tortillas

wp-1485986117159.jpg

I feel a need to apologize to you, my readers for my lack of organization! This recipe should have been on here dayssss ago! Yes, life does happen, but you have no idea how much it measn to me that others enjoy seeing the things I create in my kitchen. It is both humbling and exciting, and I pray you will bear with me as I get into a smooth flow, and I will do my very best not to let you down!

When I recreate something at home, there is always this sort-of invisible bar in my mind that I feel it needs to attain. When it comes to biscuits, they need to be flaky and better than canned, and when it comes to tortillas, they need to be soft and thin, like those found at an authentic mexican restaurant. Store-bought just do not cut it, no matter how you look at it (except possibly the super pricey ones that don’t fit well in budgets!)

These flour tortillas are the epitome of everything I want in a flour tortilla, and they are versatile, so if you need them to be a bigger size, you can divide the dough into larger portions, or if you like them a little thicker than I do, you can make them to your exact preference. Cooking is so flexible and it is so much fun just seeing what you made come together right in front of your eyes!

wp-1485986065156.jpg

I have found that these cook up best in a cast iron skillet (my go-to for EVERYTHING). You can make them in a normal skillet, however you may need a small about of oil. If you are using a cast iron skillet, you will want to start preheating it now, if not, you won’t want to start heating your pan up until you begin rolling the tortillas out.

Mixing up the tortillas is super easy, you will simply throw everything into a mixing bowl, or the bowl of a stand mixer and mix them on low for about a minute, until everything is combined. Then you will mix the dough on medium for one additional minute, to obtain a nice, smooth dough.

Once the dough is combined, you want to dump it out on a lightly greased counter, and form into a log, as seen in the first picture. Next, you want to divide the dough into the correct portion for what you ware desiring to make; for fajitas, divide into 8, burritos and quesadillas, 4 or 6, depending on the size of pan you have to cook them in. Once the dough is divided, roll each section into a ball and squash down on the counter or desired flat surface. Let dough rest for 15 minutes,

After dough is done resting, you want to start preheating your pan if you are not using cast iron. Now it is time to roll them out! Prep your counter space by wiping or spraying it down with a very light layer of oil. You don’t want them to be dripping in oil, but a light layer allows them to stretch thin when you are rolling them out without ripping (if they rip, then they are probably too thin). Roll out one tortilla at a time, cook on one side until it starts to bubble, as you can see in the middle picture, flip over and cook on the second side for about 30 seconds more. Usually the tortilla will begin to bubble up a little after it is flipped to the second side, as well, but if it doesn’t, it is ok to check it for those light brown spots to appear. These cook up really quick, and if they cook for too long, you start to have crispy tortilla shells, so once they hit the pan, you will want to be attending to it the whole time. wp-1485986123394.jpg

In order to keep these warm and fresh while you are cooking the rest, you can wrap them in foil and place in a low-heat (170-200°) oven. If you do not use them all at the same time, they can be stored in the refrigerator for a few days, or frozen, with a piece of wax paper between each one to avoid sticking


Soft & Thin Flour Tortillas

  • 1 1/2 Cups Flour
  • 1/2 Tsp Salt
  • 1 1/2 Tsp Baking Powder
  • 2 Tbsp +2 Tsp Oil
  • 1/2 Cup Warm Water


If using a cast iron skillet, begin preheating on medium heat (if you are not using cast iron, wait until you begin rolling out the tortillas)

In the bowl of a stand mixer, combine all of the ingredients, and mix for about 1 minute on low, until the ingredients are combined, then mix for one additional minute on medium.

Remove dough from bowl, and form into a log. Divide dough into equal parts, depending on what you are making. For fajitas, divide into 8 parts, for burritos and quesadillas, divide into 4-6 equal parts, depending on what size pan you are cooking them in. Roll each individual piece into a ball and flatten on counter or flat surface. Cover and let rest for 15 minutes.

If you are not using a cast iron pan, begin preheating your skillet now, on medium heat.

Coat counter with a very thin layer of oil. Roll each piece out one by one, cooking each one immediately after rolling it out. Cook on first side until medium sized bubbles begin to appear, then flip and cook on the other side for about a minute more, until the tortilla begins to bubble again, or the under side begins to have golden brown spots similar to the top.

Wrap tortillas entirely in foil and keep warm in a low-heat oven until you are done making all of them.

This recipe can be easily doubled, tripled or quadrupled. These freeze and thaw great. I freeze mine with wax paper between each one to avoid sticking. I have also used these for freezer breakfast burritos, and they were fantastic!

I hope you and your family enjoy these as much as mine do! Have a great day, and I hope you stop again soon!

<3/Jenn

Foolproof Flaky, Buttery Biscuits

Before you read the rest of this post, I’d like to ask you to just pause for a moment, and close your eyes [well, don’t do that, then you can’t read this :)], and think about that one thing you make that makes you feel giddy every.single.time.  This, my friends, is mine, and I am soooooo excited to share it with you today!!

My adventure into flaky, buttery goodness started with my  All-Butter Pie Crust (if you hevn’t checked it out, you’re missing out!). The first time I made one it was okay, but it wasn’t at it’s fullest potential. Then, I started reading some different recipes and noticing that the key was butter chunks, like HUGE butter chunks, and as soon as I implemented that one trick, I was hooked! It was like a light bulb went off!! I had made a few biscuit recipes, but none of them had settled as THE ONE until this one. The original recipe was good, but when I added my own twists, these literally became to-die-for food,

The first time I made these with my own little twist, my husband was so sweet as he listened to me go on and on about the layers. It just made me so stinking excited that I made these beautiful things with AMAZING layers (that didn’t come from a can), not to mention a crunchy (not burnt) bottom crust that just makes them even more amazing…. can you tell I am in love?!?! I promise you that you will be too! The best thing is that these are seriously soooooooo easy to make! The longest part is preheating the oven, so they’re definitely an easy addition to just about any dinner, and you can’t go wrong with these!


wp-1485466219421.jpg

I start these off by preheating my oven and my cast iron skillet together to 425°. I allow them to preheat for about 5 minutes before I even begin to put the biscuits together, so that my butter stays as cold and solid as possible before putting the biscuits into the hot skillet. When I am ready, I begin making the biscuits by first whisking together all of the dry ingredients in a medium mixing bowl.

The next step is probably one of the key things to assuring the beautiful layers you want! Once the dry ingredients are whisked together, I butter into the flour mixture, only until the chunks are cut into about dime-sized hunks, possibly even a little bigger, as you can see in the above phote. Once the butter is cut in, I add the milk and mix until everything is a cohesize ball, but being careful not to overmix.

Once everything is together, I dump my dough out onto a floured surface and flatten down enough that I can fold it over on top of itself. After folding, I turn the dough 90° , flatten dough again slightly, and fold in half again. I repeat this two more times, until all four sides have been folded over once. I then roll the dough out until it is about a 1-inch thickness.

Once the dough has been rolled out, it is time to cut them out! In the above pictures, I was making them a little bigger than usual to make sandwiches on, so I am using about a 3-in round cookie cutter (the next to the smallest cutter in this set). Using this larger size, I only got 5 biscuits. Usually I use the smallest cutter and I get 8-9 biscuits. After cutting out a biscuit, I take the egdes and turn them into the other edges so that I have no excess dough to roll out again, and continue cutting out biscuits until no dough is left!

wp-1485367179830.jpg

Once the biscuits are cut, all that is left is to cook them! When your oven and skillet are completely preheated, I grease the hot skillet with some extra butter. Next, I put my biscuits in the pan, placing them relatively equal distances around the skillet. The biscuits will bake for 18-20 minutes, until golden brown. When they come out, they can be slathered with some extra butter, or left alone, both ways are delicious!


Foolproof Buttery, Flaky Biscuits (original recipe HERE)

2 Cups Flour

1 Tsp Salt

1 Tsp Sugar

1 Tbsp Baking Powder

1 Stick COLD Butter

3/4 Cup +2-3Tbsp Milk

Preheat oven to 425° with cast iton skillet in it.

Whisk together all of the dry ingredients.

Cut the stick of butter into the flour mixture until chunks are about 1/2 inch.

Add milk and stir just until combined completely.

Turn dough out onto floured counter. Flatten slightly, and fold in half, turn 1/4 way around; repeat 3 more times until all four sides have been folded over.

Roll dough out to about 1 inch thickness, Cut into biscuits.

When skillet and oven are preheated, grease skillet well with extra butter and place biscuits in skillet, distibuting equally.

Bake for 18-20 min, top with additional butter, if desired.

wp-1485367251967.jpg


These biscuits made awesome chicken sandwiches the other night, and we enjoyed egg sandwiches on the leftovers the next morning!

If you make these or have an awesome biscuit technique of your own, I would love to hear about it in the comments below!!

Thank you for stopping by to read a little tidbit of my life, I hope you enjoyed what you read, and would love to have you follow along (∨∨ button below ∨∨), if you would be so inclined 🙂 Have a great day!

<3/Jenn

Thin Crust Pizza of EPIC Proportions


pizza

This recipe has been a FAVORITE of mine for a few years now. It is such a multi-purpose recipe, I use it for Homemade Hot Pockets and Calzones, as well as pizza, of course! I have even prepped and frozen these in a personal pizza size, and they were awesome, so you definitely can’t go wrong adding this to your recipe reportoire!

The Original recipe can be found HERE.

When I am making this dough for pizzas, I double the recipe, and that is reflected in these pictures, in case you would see the amount of dough it makes, and be concerned of their being too much. To begin with, I preheat my oven at 500° right away, as this comes together pretty quickly. I then mix together the yeast and water and allow it to start foaming or “proof.”

Next, I add in the flour, salt, and sugar and start to mix just until it starts to form into a dough, then I add in the oil and knead for a few minutes until the dough is a cohesive and elastic dough.

Once the dough is kneaded, I form it into more of a ball-shape (creative name for a blob), over the bowl with a towel and let it sit on the stove for 5-10 minutes, while the oven is heating. When the dough is done resting, divide the dough according to whether you make a single or double batch of dough. A single batch would be divided into 2 ball, the above picture is reflective of my double batch 🙂

When I’m rolling out pizza dough, instead of flouring the counter that I’m rolling it out on, I give it a quick coating of non-stick cooking spray, to both the counter and rolling pin. I find it helps my dough to stretch really well, no sticking, and the dough is always a perfect crispiness!.I roll the dough out to the shape and size I need.wp-1484967812644.jpg

Once the dough is rolled out, I transfer it to a parchment-lined pan and top it with whatever toppings we happen to be in the mood for (we range from traditional pepperoni & cheese to veggie, and even a bbq chicken<3). Once you’ve got your toppings on there, I toss it in the oven for about 8 minutes, and we get this beautiful thing you see below!

If you want thin crust, this is the only dough you need, I guarantee you will love it!!!


Epic Thin Crust Pizza (mixer to mouth in 20 minutes!)

1 Tsp Active Dry Yeast

3/4 Cup Warm Water

1 Tsp Sugar

1 Tsp Salt

2 Cups Flour

1 1/2 Tsp Olive Oil

Preheat oven to 500°. Mix together water and yeast, allow to sit for 5-10 min, until yeast starts foaming.

Add in sugar, salt, and flour. Knead together just until dough starts to come together. Add in oil, and knead until dough is smooth and elastic. Cover bowl with towel, and allow to rest on warm stove for 5-10 minutes while the oven heats.

Prep counter with a thin coat of non-stick cooking spray. Divide dough into two balls of dough. Roll out one ball at a time to the size and thinness desired. Transfer to a parchment-lined pan. Top crust with desired toppings, and bake for 8-10 minutes.

Allow to cool for a few minutes before serving! Enjoy!

If you make this, or use this recipe for your own creation, I would love to hear about it below, or tag me on Instagram @impassionedkitchen or #impassionedkitchen!

See you again soon! <3/Jenn


2-Ingredient Egg Noodles


noodles

This recipe is so ridiculously simple and easy, I truly and honestly LOVE it. I started out on a search for the best homemade egg noodle recipe out there. I mean up until just a few years ago, women have been making their own pasta, and well a lot still do, and I wanted to learn so badly…. but every recipe was just so many ingredients or so tough that there was just no way. I would try it and it would be okay, the hubby woulfd graciously say it’s alright, but we all knew, it just wasn’t it. Until a couple of months ago, when I found the simplest recipe for egg noodles EVER. Literally just two ingredients. I made them, but it’s one of those things you kinda have to catch on to the consistencies and whatnot, so the first batch wasn’t THAT good. Then on Sunday, I decided to make Beef TIps and Gravy over homemade egg noodles, and I gave that recipe another try, and it turned out AWESOME!!! So now I’m gonna share it with you today…

The original recipe is found HERE, if you would like to check it out.


20170108_133614

Before I started making the noodles, I put on a large pot of water to boil, so it is ready about the same time as the noodles. Making the dough is pretty simple, just eggs and flour, and mixing it until its smooth and elastic, but not sticky or too stiff. i mixed mine up in a bowl and when it was ready, i turned it out onto a lightly floured surface.

20170108_134142

Next, I really just rolled and flipped and rolled and flipped the dough, making sure to flour the counter each time, yes ,I even flipped it when it was just a hair smaller than the picture. This is the size I ended with… I don’t have the exact measurements, but it was pretty big! THe dough is pretty thin, because my hubby likes his noodles like the store-bought, and not the thicker-cut you can get some places. I love this recipe because the dough is really easy to roll out and you can really just stop whenever it is a thickness you like!20170108_134712

I used my pizza cutter to cut the noodles longwise and then into noodles, and my dough scraper made it super easy to lift the noodles off the counter, which if you flip the dough and flour the counter quite a few times, should be super easy! Once they are all off the counter, I simply tranferred them to the boiling water, and let them cook for about 10- 15 min until tender, cook times may vary a little, depending on how thick the noodles are.

20170108_141602

They paired very nicely with my Crockpot Beef Tips and Gravy, and a hunk of homemade bread! Sunday Dinner was a hit!


2-Ingredient Homemade Egg Noodles

2 Large Egg

2 Egg Yolks

1 1/2 Cups Flour

Put on a large pot of water to boil.

Mix eggs, yolks, and flour together until combined. Knead dough by hand or in a stand mixer until smooth and elastic.

Turn out dough onto a large, well-floured surface. Roll out dough to desired noodle thickness, flipping dough and flouring surface several times, to avoid sticking.

When dough is desired thickness, cut into noodles using a sharp knife or pizza cutter. Loosen from the counter and toss with a little flour to keep from sticking together.

Transfer to boiling water in small handfuls, to avoid clumping, and cook until tender. Drain. Enjoy by themselves or in your favorite recipe.

I would Love to hear about how you made these! Please leave a comment below and let me know!

Simple, Easy Polish Pierogi


pierogi

I LOVE expanding my know-how in the kitchen, and learning new recipes. My husband’s pap, who is hungarian, brought up pierogi a while ago, and being as how I am mostly Polish, I was embarrassed that I had NEVER even thought to make them before! I have only had them homemade once before, when I was very young, and I guess at that time they didn’t really make a huge impression on me, but NOW making my own food, I HAD to make them! So, this past Friday, I tried my hand at it, and I honestly have to say that they really aren’t very difficult to make! I didn’t plan my time very wisely so I ended up wasting about half of the dough (very sad!), but they were delicious, and the hubby gave them a huge thumbs-up, so that makes them a definite winner in my book!!

I got the original recipe from this lovely post HERE!

20170106_161853


I started out by dicing up my potatoes and getting them boiled, starting a large pot of salted water to boil, as well as melting my butter for the dough, and warming up my milk.

I warmed my milk up simply by pouring it into the melted butter, and that seemed to work out nicely. Next, I dumped the flour on the counter, and made a well in it. I then proceeded to dump allllllll of the butter/milk and water into that at once…. which I definitely would not recommend doing! I had a hot mess for a minute, but quickly got it contained and all was well. I recommend adding just small amounts at a time, until it is all mixed in.

Once it was all mixed together, I kneaded it until it was a nice smooth ball, then covered it with a small mixing bowl, and allowed it te rest for about 20 minutes.

20170106_164245

While my dough was resting, my potatoes were done cooking, so I drained them, and threw them in my mixer, along with the cheese, and whipped them up until they were nice and smooth.

After the dough rested for about 20 minutes, I divided it in half, and rolled it as thin as I could get (I tried to get the fork in the picture to show a size reference, it’s pretty thin!) I then cut the dough into rounds using about a 4 inch circle cookie cutter.

Once the rounds are cut, I put about a teaspoon of the potato mixture in each round, put a little water around the edge, and then brought the edges together. I made sure to smush those edges together, so they don’t come apart  when they’re boiling. Once they’re ready, pop them into that pot of boiling salted water, wait for them to come to surface, let them boil for another minute, and they’re done! At this point, you can eat them as is, throw them in a bunch of melted butter and onions, or fry them up so they’re crispy!

20170106_171528

We chose to fry them up with some ham, and they were deeeeee-licious!! Definitely a do-again soon!!


Simple, Easy Polish Pierogi

Ingredients:

Filling:

4-5 Medium potatoes, diced

4 oz Monterey Jack cheese

Dough:

1 1/2 Cups Flour

1/4 Cup Warm Milk

1/4 Cup Warm Water (can add a little more if needed)

1/2 Tbsp Melted Butter

Filling:

Boil potatoes until tender. Drain, add in cheese, and mash until smooth; set aside.

Dough:

Put on a large pot of salted water to boil. Dump flour in a heap on a clean counter, and make a well in the middle. Combine milk and butter, and add slowly to the flour. Add water gradually until it is all mixed together, and knead until dough forms a smooth ball.

Cover with a mixing bowl and allow to rest for 20-30 minutes. Once dough has rested, roll out on a well-floured surface until very thin. Cut into rounds.

Place a teaspoon of the potato mixture on each round. lightly wet the edge of each pierogi round, and press edges together firmly.

When water has come to a boil, put 8=10 pierogi in pot at a time, and allow to boil for 1 minute after they have come to the surface.

Remove from water with a slotted spoon. Can be eaten as is, served with melted butter and sauteed onions, or fried for a crispy edge!

If you try this recipe out, I would LOVE to hear about it! Please leave me a comment below, and let me know what you think!!

Until next time, Jenn ❤


Old-Fashioned Chicken Pot Pie

20170105_173402-1

Can you believe we ae already one full week into 2017?!?!?!? Seriously, I do not believe time can fly ay faster! This past week was a different one for us, we started off with family staying for a quick visit, and ended it with catching up the rest of week, and I am kicking this week off with catching up here, on the blog! I said the other day that I cook and bake faster than I type, and that is a serious problem! So I apologize for being a little behind my Instagram this week, and I hate to say, I may do it again, but that’s real life, and I promise I will always do my best to be genuine, mistakes and all (but hopefully not too many).

We had Chicken Pot Pie this past Thursday (seems like forever ago now), and I was able to get the crust recipe posted (check that out HERE) but as amazing as the crust is, you can’t have crust without some filling, so I’m here to share my recipe with you today!

I love this recipe because it’s pretty simple and easy to put together. You can even make everything ahead of time, then roll out the crust, fill it, and pop it in the oven for those nights you don’t have time to make it all at once!

I always start out by making my crust (recipe here), and get that chilling. Once that is in the refrigerator, it’s really entirely up to you when to start making your filling. If I am making it that night, I usually start putting together my filling after the dough has chilled for about an hr.

I start by preheating my oven to 450 degrees. I dice my chicken and cook that in the chicken broth on low heat, along with my seasonings (if you are rushed, you can boil it, but your chicken will not be quite as tender). While that is cooking, I dice up half an onion and saute it in the butter, just until the onions become tender and fragrant and remove from heat.


In a small mixing bowl, whisk together flour and milk until smooth. When chicken is cooked, stir in onions, milk mixture, and vegetables, and cook for a few minutes on medium heat, just until thickened.

20170105_164046

While that is heating, roll out pir crust and place in pie plate. Chill until filling is ready.

When filling has thickened, pour into prepared pie crust, top with second crust. Tuck edges under, into sides of pan, and crimp, or shape however you desire!

picsart_01-06-03-19-07

Cut vent into top of crust, and bake for 35 minutes or until golden brown. Allow to sit for approximately 10 min, cute and serve.


OLD-FASHIONED CHICKEN POT PIE

Preheat oven to 450.

Ingredients:

Pie Crust Recipe

1-2 lbs of Chicken, diced

2 Cups Chicken Broth

1/2 Tsp Salt (can use more to taste)

Dash Thyme

Dash Rosemary

3 Tbsp Butter

1/2 Onion, diced

1 Cup Milk

1 Cup Flour

16 oz Frozen Mixed Vegetables

Combine chicken, broth, and seasonings in a medium saucepan, and cook on low heat until chicken is cooked through. While chicken cooks, saute onion in butter until fragrant and translucent. Remove from heat.

In a small mixing bowl, whisk together milk and flour. When chicken is cooked, stir in onions and the milk mixture and cook on medium heat, until thickened slightly.

Pour into prepared pie crust. Top with second crust, tuck edges under, and shape as desired. Cut vents in top and cook in preheated oven for 30-35 minutes, or until golden brown.

Allow to sit for 10 minutes, cut and serve. Enjoy!!

20170105_173337

If you make this, or have your own twist, I would LOVE to hear about it! Please leave a comment below, and thanks for stopping by!

Until next time, Jenn ❤

The Ultimate, All-Butter, Flaky Pie Crust!

picsart_01-06-03-22-50
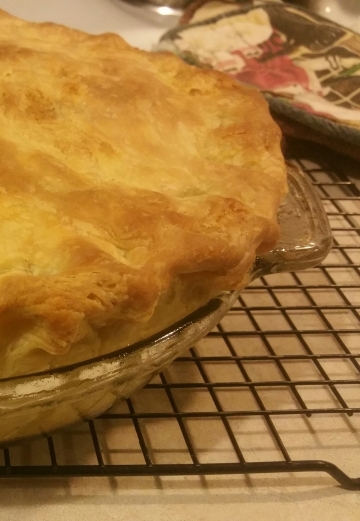
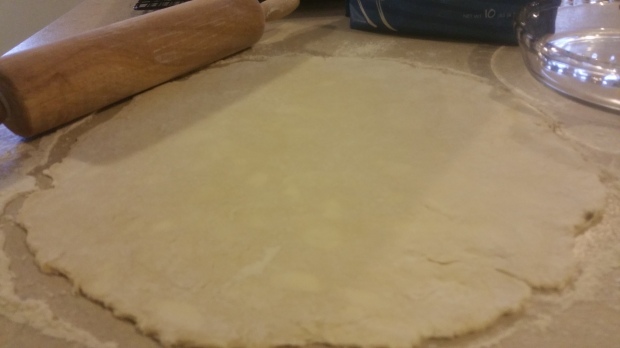
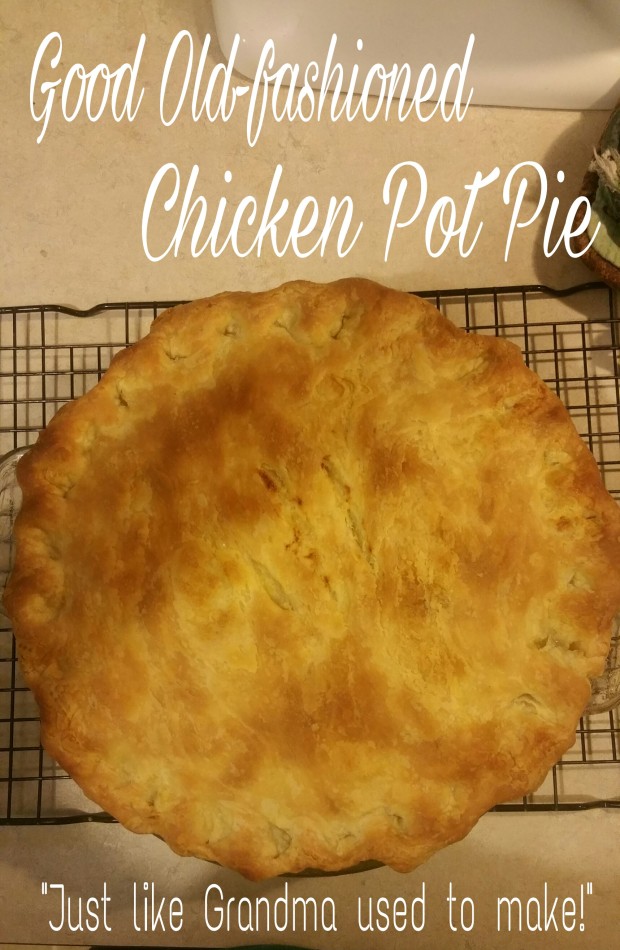
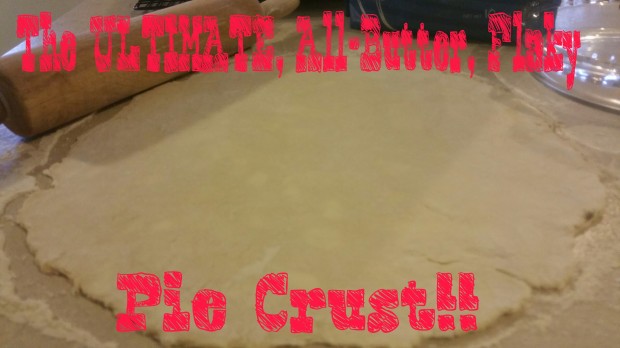
Good Afternoon!! It is stinking COLD here in good old Okie land! I don’t know if any of you may follow me on Instagram (@impassionedkitchen), but yesterday I shared a picture of our AMAZING Chicken Pot Pie we had for dinner! My plan was to post the recipe today (which I still am) but there was no possible way I could share the recipe for the Pie filling, without first sharing the pir crust!

So, without further ado, I share with you the recipe I have personally found to give the Flakiest, most delicious results for both savory AND sweet pies, and the best part is, as I may have hinted at in the title…. there are NO hydrogenated fats in it! That’s right, we are alllllll butter here, baby!!

You can find the original recipe HERE!

20170105_152927

Start off by whicking your flour and salt together in a medium sized mixing bowl. Next, cut your COLD butter into the flour mixture. There are a few methods to doing this, but my very favorite, tried-and-true technique is simple using a pastry cutter. If you’ve never done it before, really all I do is cut down through the butter and flour with a kind of twisting motion, and only for maybe about 10-15 times, because you don’t want the butter to get tooo cut up.

This is what mine looks like, and I tried to zoom in on the second picture to show you the size… the fork is just a regular dinner fork, and I don’t know if you can see the chunk of butter very clearly nxt to it, but the one right next to that one shows up pretty good, and the chunks are pretty BIG!! Big giant chunks of butter are KEY to getting the delicious flaky layers that make this pie crust so amazing.

Next, you want to slowly add the water, and just use a fork to gently mix until almost all of forms a ball… you don’t want it be sticky, if there is a little bit of flour falling off, it’s ok to use your hands to knead it together just a TINY bit, but you want to avoid it as much as possible, so that the warmth from your hands does not melt that scrumptious butter.

Once it forms a ball, cut it in half, wrap each piece in plastic wrap, and chill for about 1 hour. If you cannot use it immediately, it will stay safe in the refrigerator for up to 4 days.

Once dough is chilled (if chilled for longer than a few hours, allow to sit on the counter for about 5 minutes, to avoid huge crack in your dough when you roll it out.), roll one section out until it is about 2-3 inches bigger in circumference than your pie pan. See the huge chunks of butter in the rolled out dough?!?!?!? That is a sign of GREATNESS!!

Transfer pie crust to pie pan. I have found the easiest way to do this is to either loosely wrap crust around the rolling pin and unroll over pie pan, or fold in half and then quarters and unfold over pie pan. If your filling is not ready to go in the crust yet, refrigerate rolled crust, as well as the other section that has not yet been rolled out until filling is ready.

When filling is ready, pour into prepared crust. Roll out the second portion of dough, following the previously stated instructions, and place evenly over filled bottom crust. Some people prefer to clip extra crust overhang. I, however, prefer to tuck it under, into the side of the pie crust, as it gives more dough to work with when you give it a nice scalloped edge, as well as the phenomenal flaky edges!

Finally, remember to cut a couple vents in the top, or decorate however you may desire and cook according to the recipe you are using, and there you have it!


Ingredients.

1 cup (2 sticks) unsalted butter, cut into 1/4-inch pieces and chilled

2 1/4 cups all-purpose flour

1 teaspoon salt

8 to 10 tablespoons ice water


Instructions

Whisk the flour and salt together. Cut in butter until largest lumps are about dime-sized.
Using a fork, add water a few tablespoons at a time until mixture forms mostly into a ball. Push all the loose flour into the ball using your hands, divide ball in half, wrap each half individually, and refrigerate for at least an hour, up to 4 days.

After chilling, remove dough from refrigerator, an let sit 3-4 minutes to soften. Roll out dough on a lightly floured surfact, flipping a few times, to avoid sticking, until the diameter of the dough is about 3 inches larger than the pie pan.

Carefully transfer pie crust to the pie pan and continue with pie recipe as directed.

Cheesy Scalloped Potatoes & Ham


So this last couple days, we had the privilege of having my husband’s brother and his family stay with us, and it gave me the privilege to kind of spoil them with food, since cooking is kind of my thing! We started off their stay with homemade cinnamon rolls and meatball calzones and ended with cheesy scalloped potatoes and ham, and while they enjoyed it all, I have to say the biggest hit (and simplest to make) was the potatoes!!! Soooooo simple, it takes a few minutes to prep, but then you can toss it in the oven and let it cook away, it’s a beautiful thing!! Sadly, I did not get a picture!!!! It was such a huge hit with EVERYONE that I am sure I will be making it again very soon, and I will update with a picture!

Ingredients:

3 Tbsp Butter

3 Tbsp Flour

1 Tsp Salt

1/8 Tsp Pepper

2 Cups Milk

1 8oz block, or 2 Cups Shredded Extra Sharp Cheddar Cheese

6 Cups peeled & Thinly Sliced potatoes

Approx 1 lb ham, cut into small chunks


First,  preheat oven to 350, and prep your pan. I have used both a cast iron dutch oven as well as a glass cake pan, both work great, but my personal favorite is the cast iron. If using cast iron, allow pan to preheat in oven as well, and spray with cooking spray before pouring in potatoes & ham. If you are not using cast iron, simply grease your pan and set aside.

Next, prep your ham & potatoes and place in a large mixing bowl.

Melt your butter in a medium saucepan, and whick in flour, salt and pepper. Gradually add in  milk. Bring to a coil on medium heat, stirring continually to avoid scorching milk. once boiling, cook for approximately 2 minutes, or until thickened.

Turn heat off, add cheese and stir until melted. Pour cheese mixture over the ham & potatoes and mix until everything is pretty well coated.

Pour into preheated cast iron dutch oven or greased cake pan, and bake, covered for 50 – 60 minutes. Uncover, and bake an additional 20-30 minutes until tender.

I guarantee these will be a smash hit with your family!

If you make these, or a variation of these, I would LOVE to hear about it! Please leave me a comment below, and I will be sure to check it out!!

Until next time, Jenn ❤